If you’re just starting out as an OnlyFans creator, you’ll have to get verified before you can post anything on the site. Given that OnlyFans verification stands between you and a share of the platform’s massive earnings, that’s perfectly understandable.
This article will guide you through the process, including how to:
- Sign up
- Verify your email
- Set up your profile
- Provide personal details
- Connect your bank account
Note: Don’t bother trying to sign up with fake data or someone else’s information — you won’t get verified and you risk getting banned. Just be honest, submit everything they request, and you’ll be fine.
How to Get Verified on OnlyFans: Step by Step
Take the following steps, and you’ll quickly earn a spot on the world’s No.1 place for selling homemade content.
1. Sign Up
Naturally, you can’t get verified if you don’t sign up first, so hop over here and do it.
It’s best to keep your OnlyFans separate from other parts of your life, so we suggest using a new email.

But if you care about privacy as much as Charlie Sheen, there are other ways to sign up. Namely, you can use your Google or Twitter account, or even Windows Hello login (for PC users).

2. Verify Your Email
If you went with a new email, your home screen will display a button called Verify email.

Click on it, then press Send confirmation, and check your email client for the message with the link.

In case you don’t receive it shortly, check your spam folder. If it’s not there either, contact OnlyFans’ support by following this link or clicking the Contact button in the site’s footer; they’ll help you sort everything out.

3. Set Up Your Public Profile
You can now start the actual process on the OnlyFans homepage.
If you’re a PC user, click on More on the left side of your screen.

Then click on Become a Creator (To Earn).

If you’re on a phone, though, tap your profile picture in the bottom right corner, and pick the same option.
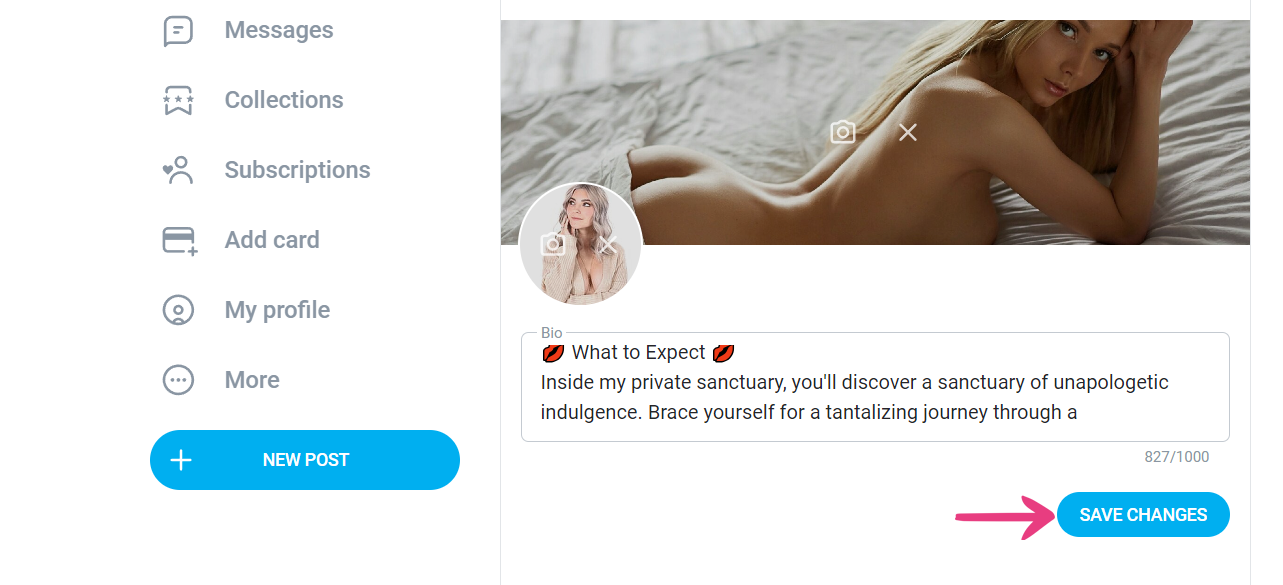
Here, you’ll set your username, upload your profile and banner photos, and write something sexy about yourself. But remember that those two photos can’t be explicit — save the good stuff for the paying customers.
![]()
As long as you don’t break any rules, your name and profile visuals likely won’t affect the verification process. However, a few nice pics and a catchy name will definitely help you attract more subscribers.
After you add everything, click Save changes.
Then, confirm your country of residence (can’t be changed later) and that you’re 18 and of legal age where you live. Click Next.

Then, click on Complete verification and confirm it afterwards.

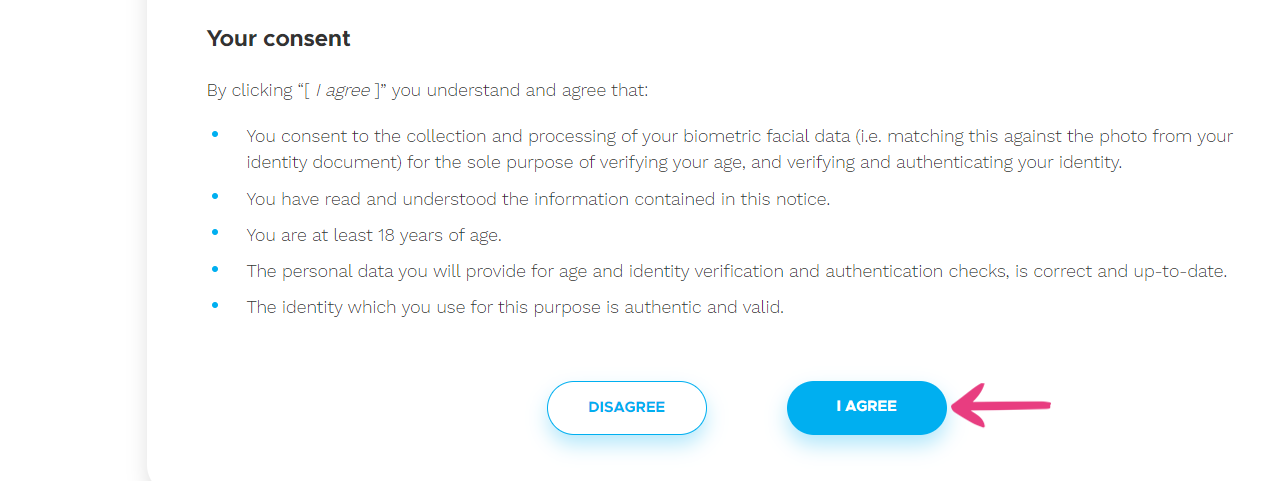
This will open a page where you’ll need to consent to OnlyFans’ data processing policy by clicking on Agree.
If you’re on a PC, here they’ll ask you to switch to a phone to speed up the process.
To do that, you’ll need to scan a QR code or use a URL. You can get the link via SMS, or they can display it for you to enter into your phone’s browser.
However you open this new menu, you will have to provide an identification document (ID card, passport, or driver’s license). Whether you have one, two, or three options here will depend on your country of residence.
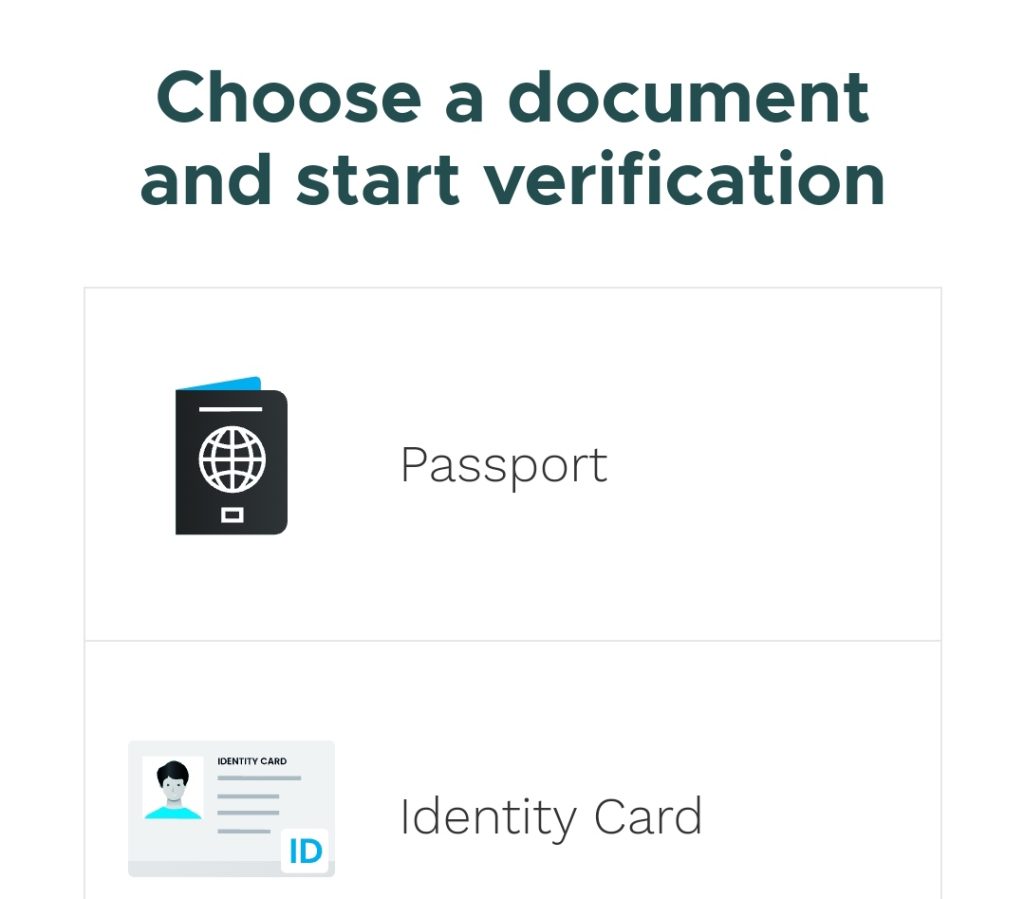
Take a couple of photos of the document you chose — front and backside (if applicable). Make sure that the whole document is clearly visible (not blurry, too small, or too dark).
In addition to all this, you’ll also need to provide a photo of yourself — a headshot, to be exact. Just follow the instructions they provide, and you shouldn’t have any issues here.
4. Provide Personal Details
After you’ve completed all of the above, open the dropdown menu and select Become a Creator (to earn) once again.

Now, you’ll need to enter the following:
- Your legal name
- Your full address
- Your date of birth
None of the aforementioned info will be shared on your profile, so you can deliver it without worry.
You can also add links to your Twitter, Instagram, and website — if you don’t have one, you can easily get it from us with the TeaseX theme. This is optional, but we suggest doing it to increase your chances of getting verified.
Next, set your profile to public and upload half a dozen pictures with your face visible (if you have none). This will show that you are a real person and make the verification process easier.
Following that is the good ol’ photo ID step — part two. Click on Document type and choose one of the three options:
- ID card
- Passport
- Driver’s license
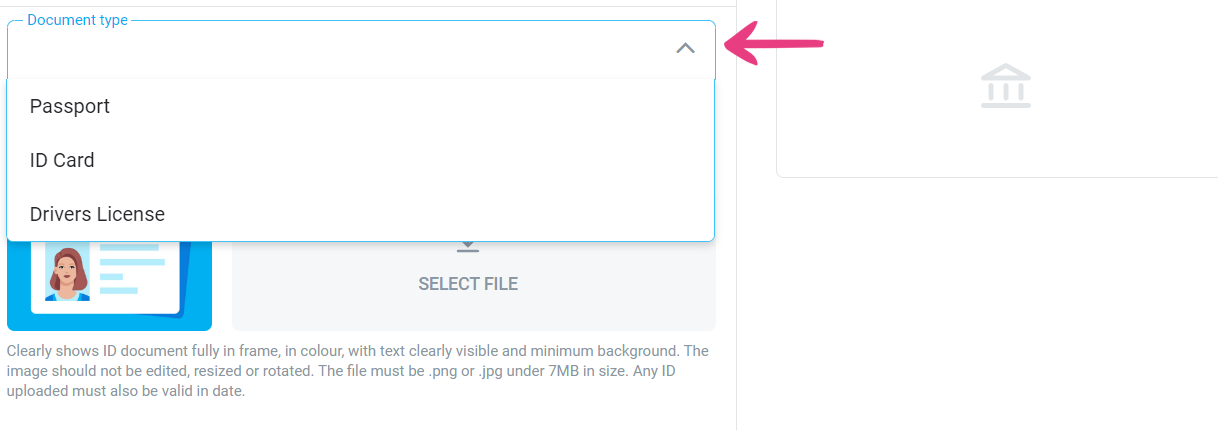
Again, you’ll need to provide a picture of the document you chose — you can snap a pic or upload one. Like before, it has to be fully in frame, in color, with minimal background and clearly visible text.
Ensure that the photo is unedited, in .png or .jpg format, and under 7MB. Additionally, the document must be valid for at least 30 days after submission.
Next, you’ll need a photo of you holding the document you chose. Do it exactly like they show in the instructions, and you shouldn’t have any problems.
Under the photo submission sections, you’ll see release forms and an upload box. This is for those who are going through the process on behalf of someone else.
If you’re not doing that, skip it, go to the ID expiration date box, and fill it in. At this point, all that’s left is to hit the Send for approval button and wait.

OnlyFans will usually get back to you in 24 to 72 hours. If they take longer, contact support.
5. Connect Your Bank Account
If everything goes according to plan, you will get an email informing you that you have been approved. Congratulations!
That means that you’re one big step closer to your goal — making your first OnlyFans bucks! Right after you connect a bank account with your OnlyFans account, that is.
On your home screen, there will be an option called Please verify that your payout details are up to date. Click on the hyperlinked part of the message, or go to the drop-down menu and click on Add Bank.
Here, you’ll need to complete a W-9 form (or a similar tax document if you’re not from the US). Once you fill it out properly, scroll all the way down and hit Send.
Then, they will ask you to provide some banking information, such as:
- Routing number
- Account number
- Account type
- Account holder’s name and country
Note: Your bank account must be in your own name and from the same country that issued the ID you used. Also, if your country is not on the list, you won’t be able to receive payments from OnlyFans.
Next, you’ll need to agree to the terms and conditions and click on Save payout details. That will prompt a security check pop-up window, so hit Send code to my email, copy-paste it, and Confirm.
With that done, a message will appear on the screen, letting you know that you’ve successfully connected your bank account.
What If You Get Declined?
If they shut the door in your face, you can simply knock again and resubmit. Just be persistent, and they will let you in sooner or later.
Fortunately, OnlyFans will email you to inform you about the problem. It’s usually something small, so you can quickly resolve it and resubmit.
Some of the more common reasons for models getting rejected include:
- A poor quality photo ID selfie
- A poor quality photograph of your ID document
- Submitting an expired or soon-to-expire ID
- Submitting a damaged ID document, etc.
If you’d like to avoid these usual pitfalls and give yourself the best odds to make it on the first try, go through this list. The more bases you cover beforehand, the better you’ll do.
Getting denied is no big deal, especially since there is no refractory period — you can try again immediately. But if that happens and you don’t get an email explaining why, contact support, and they’ll surely help you out.
Why Is the OnlyFans Verification Process Necessary?
While it’s true that verification is mainly there for OnlyFans to avoid lawsuits, content creators can also benefit from it.
First and foremost, it keeps minors safe from exploitation by entirely excluding them from the platform. Secondly, it prevents people from uploading stolen content and making money from other people’s work.
In addition, it also helps maintain a safer and more secure environment on the platform. Plus, it builds trust and credibility among creators and subscribers.
Is the OnlyFans Verification Process Safe?
Many people are hesitant about sharing their personal information, especially online. That is all perfectly understandable, but there’s no need to worry when it comes to OnlyFans.
Ondato, a tried-and-true company specializing in verifying users online, handles most of the process. You can rest assured knowing that anything you submit for verification will only be used for that purpose and will not be shared in any other way.
After you receive your checkmark, you can remove all the photos containing your face and scrub all personal info. This makes OnlyFans perfect for those who only want to sell feet pics or become a foot fetish model.
OnlyFans Verification FAQs
For convenience’s sake, here’s a collection of common questions about OnlyFans verification — along with their answers.
Q: How long does the verification process take on OnlyFans?
A: It’s hard to say for sure, but you’ll typically get approved within 24 to 72 hours.
Q: Do I have to get verified to earn from OnlyFans?
A: Yes, anyone who wishes to publish content and profit from OnlyFans will have to get verified.
Q: Will I need an ID to pass OnlyFans’ verification?
A: That’s right. Anyone wishing to become a verified model will have to submit a government-issued ID. As you probably expect, this rule is in place to keep minors away.
Q: Is it safe to share my personal data with OnlyFans?
A: Absolutely. Your information will just be used for verification purposes and won’t be visible on the site or anywhere else.
Q: Is it necessary to share my bank account with OnlyFans?
A: It is if you wish to withdraw your money, since bank transfers are the only withdrawal method that they support. There’s no need to worry, though, as the process is entirely safe.
Q: I want to shoot content with my partner, but they don’t have a verified account. Are they going to need it?
A: Not at all. You can create content with a non-verified model, but that model will have to fill out OnlyFans’ official release form, which you’ll then need to submit. See our guide for more info on that.
Q: I keep getting rejected, and OnlyFans’ support isn’t helping me out! What should I do?
A: If you’re doing everything we listed and still can’t pass the process, here are some additional measures you can take:
- DM OnlyFans’ support on Twitter; they occasionally respond there
- Add more than 2 social media accounts to your OnlyFans account
- Post recent face pictures or selfies on the social media accounts you’ve submitted
- If you didn’t submit your personal social media accounts earlier, try adding them (again, they will only be used for verification)
- Try and get clearer photographs for the photo ID step
- Ty and cover as little of the ID document as you can during the photo ID step
- If all else fails, keep pestering OnlyFans’ support across all available channels until you get the help you need
Conclusion
OnlyFans just keeps on growing, which attracts even more users, and helps it expand even further. This magical circle of lust brings countless people to the platform, every day.
Luckily, you’re already one step ahead of the competition because you know exactly how to get verified on OnlyFans. With these step-by-step instructions, you’ll be ready to start making money faster than a premature ejaculator can cum.


